welcome to
The tomkat studio blog
Search
Hot Chocolate on a Stick :: Holiday Gift Guide Recipes
Share To:

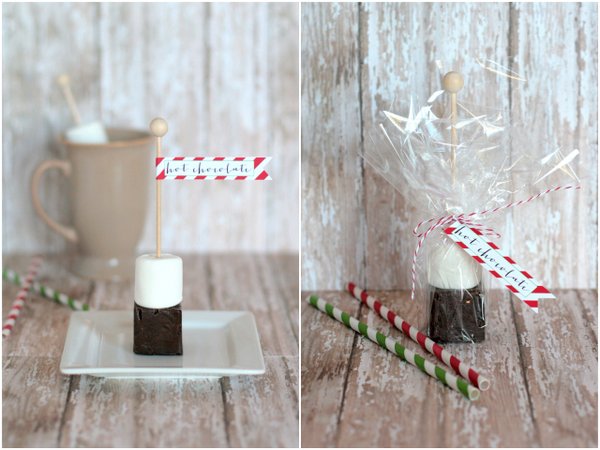
A few weeks ago, I made Hot Chocolate on a Stick to share the recipe for Tatertots & Jello’s holiday blog series. I also shared the recipe in this year’s Holiday Gift Guide! I came across this idea last year when my neighbor made these adorable treats for a cookie exchange. I located the recipe on Make & Takes (originally from King Arthur Flour) and wanted to try them myself! I wasn’t sure if it would be hard to cut them into squares once they were set, so I decided to try using silicone 1oz. ice cube trays and they worked beautifully. I added marshmallows and used our wooden rock candy sticks for a cute touch. I also designed free printable hot chocolate flags that you can attach to the sticks if displaying at a party, or attach to twine if packaging the treats.
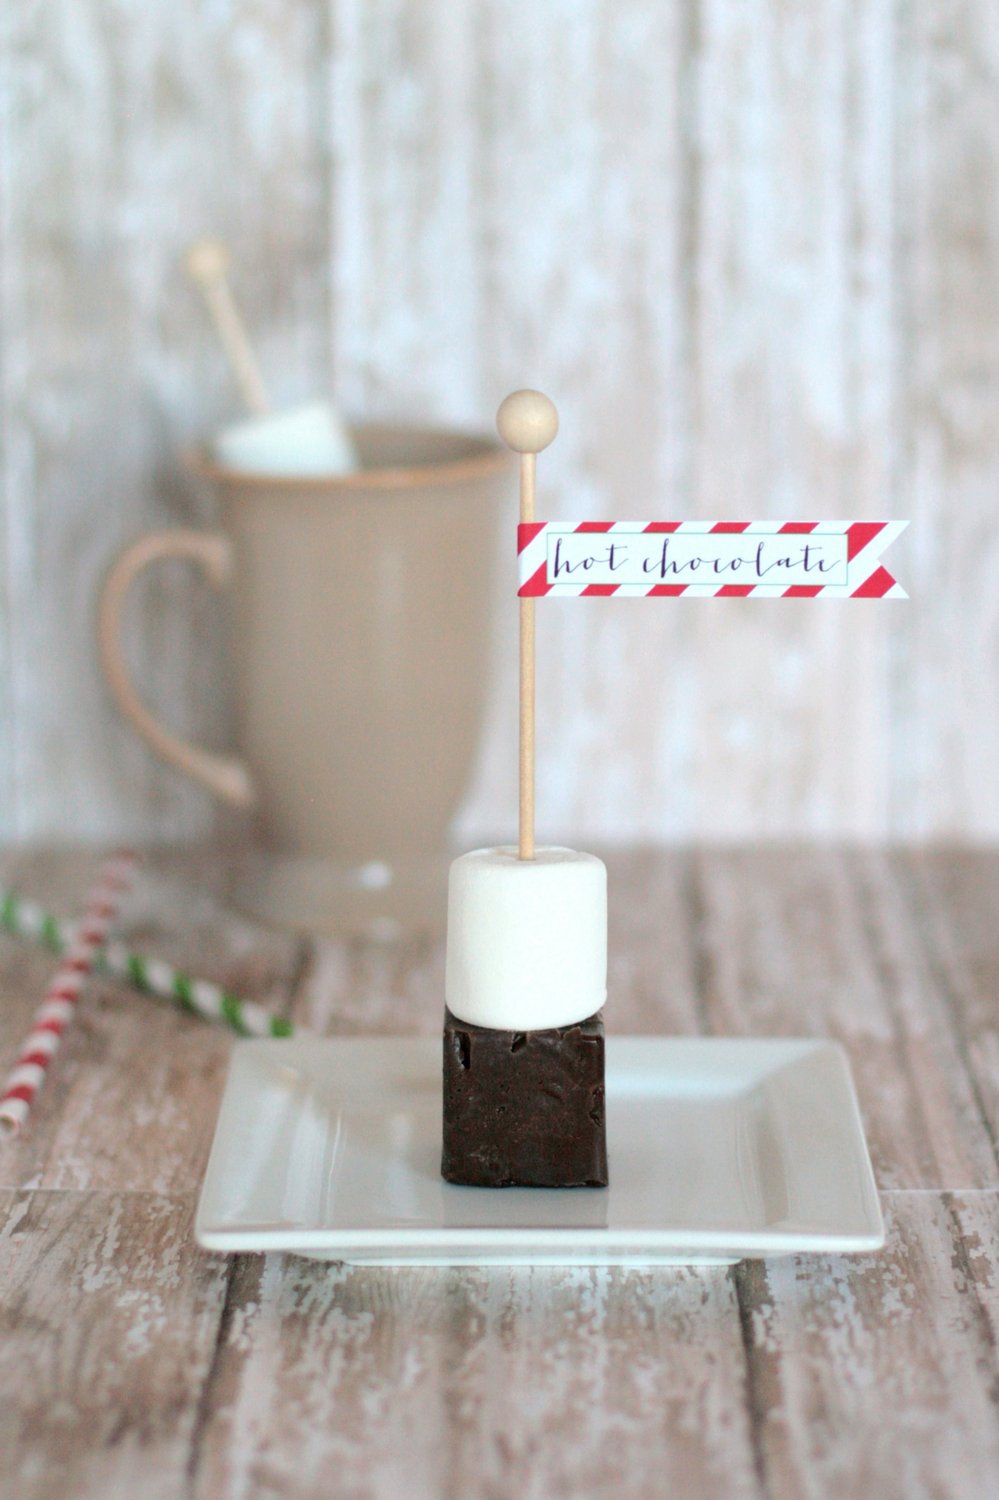
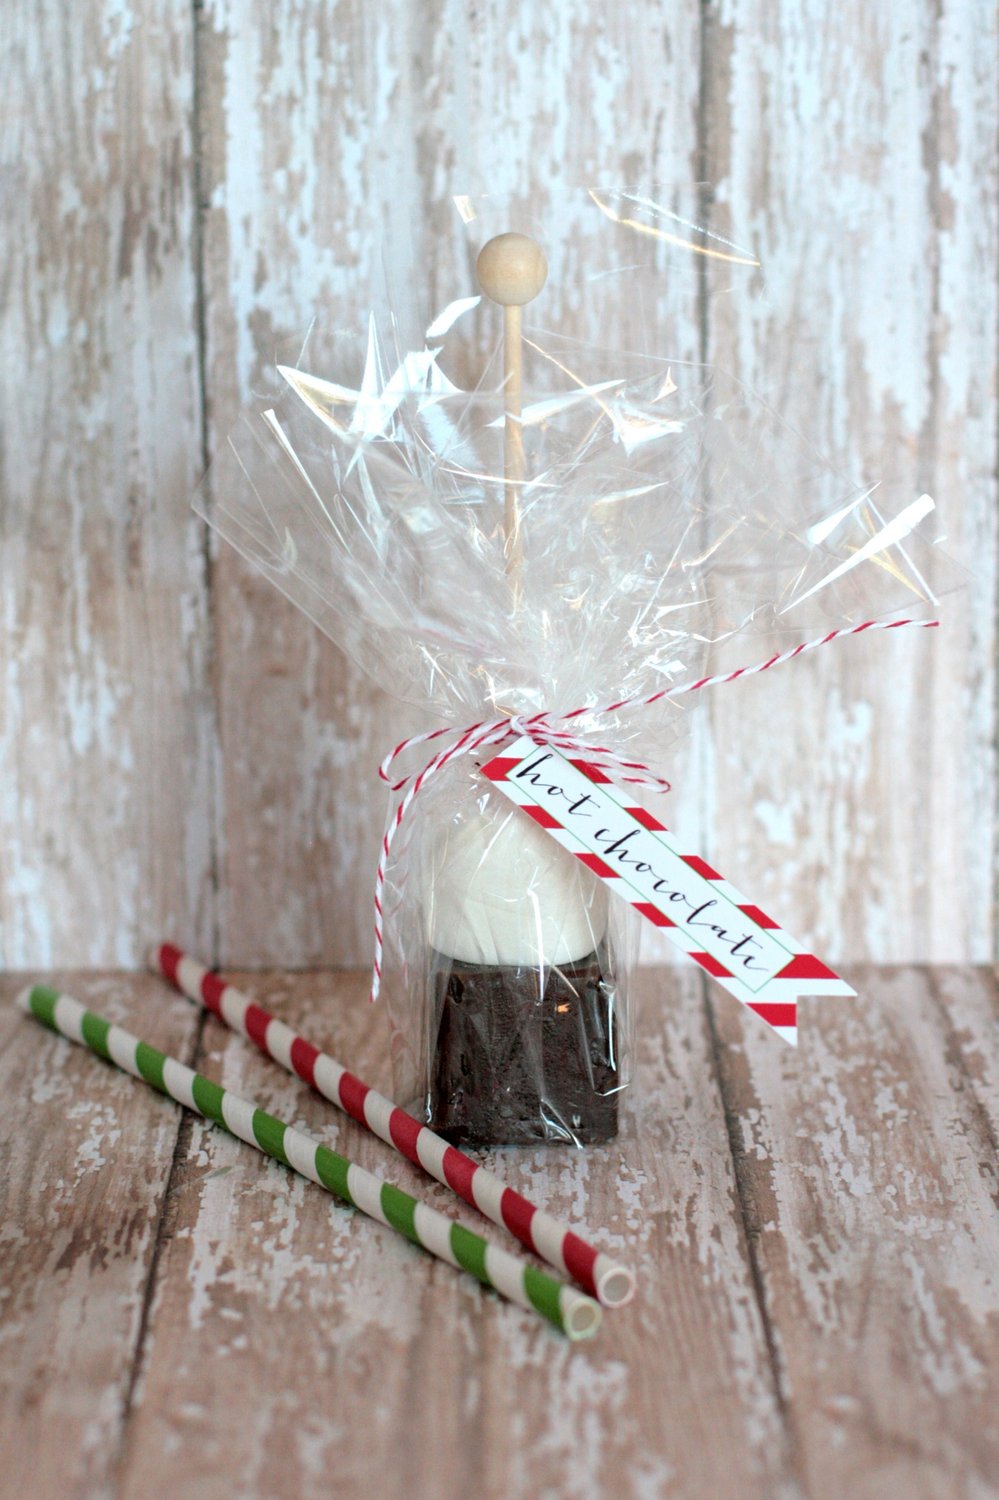
Click on the image below to download the Hot Chocolate Flags!

To make the hot chocolate, just add a Hot Chocolate Stick to a cup of hot milk. Continue stirring until melted. I don’t think I’ll want to have hot chocolate any other way now that I have tried this! It has a very rich chocolate flavor and is super creamy….so delicious!
Here is the recipe (via King Arthur Flour)
Hot Chocolate on a Stick
- 1/2 cup heavy cream
- 14 oz can sweetened condensed milk
- 3 cups semisweet chocolate chips
- 3/4 cup unsweetened baking chocolate (I used 6 – 1 oz blocks)
- wooden sticks or lollipop sticks
Line an 8″ x 8″ pan with parchment paper or foil (or you can use a silicone mold like I did). Heat the cream and condesed milk over low heat until steaming. Remove from heat and add chocolate. Allow to melt gently. After 10 minutes, return the chocolate mixture to low heat to completely melt the chocolate. Whisk vigorously until mixture is thick and shiny. Pour into pan or scoop in silicone molds. Shake or tap on counter to level. Set aside overnight to set. (I put in the refrigerator) If using a silicone mold, pop each block out of the mold. If using a pan, run a knife around the edge and turn out onto a cutting surface. Slice into 1 1/4″ cubes. For the smoothest cuts, heat a knife in hot water and wipe dry before each cut. Stick a wooden stick in each block.

The wooden rock candy sticks are available in our shop…
…ON SALE right now!
Click here for details!
November 28, 2012
Post Date:
Leave a Reply
SUBSCRIBE
Don't miss a thing! Subscribe to our email list to keep up with our latest projects, listings, blog posts and giveaways!

I am SO making these for Christmas gifts 🙂
Seriously yummy….and too cute!!
Silly question, but are there directions to give to your recipients. For example, ‘Stir stick in 1 cup of hot water.’ I want to create a printable that has a holiday greeting on one side and the directions on the other. Thanks for all that you do!
I am wondering the same .
Great idea! If I can find a few spare minutes, I will whip something up!
So cute! I’ve been wanting to try this for a while…. this year may be the year! The little flags make them extra special!
Thanks, Glory! They are so easy…and so cute!
what size mold do you use?
I LOVE it!!! just wondering….with the cream and milk, should they be refrigerated?
I’m also wondering if these should be refrigerated. I absolutely love this idea !!
The original recipe doesn’t say anything about keeping refrigerated, but I definitely kept mine in the fridge!
This recipe definitely has me intrigued…I’ve never tried anything like this before!
These are adorable! Definitely adding these to my list of things to make for the holidays. So cute! 🙂
So cute! I love the sticks. These would be cute for the neighbor kids! Or party 🙂
Love the printable flag and how nicely these were packaged.
Where did you buy the 1 inch silicone ice cube molds? Thanks!
I love the addition of the marshmallow! Never seen that done before.
Need more sticks please!!!
Thanks for the idea Kim! I made them last night with my daughter and put them in the fridge overnight. I was so excited to assemble them but had trouble getting them out of the silicone 1 oz molds I got on Amazon. Do you have a trick on getting them out and keeping them looking pretty?
I used a Gingerbread silicone mold and it worked perfect! I added peppermint marshmellows to the bag and wrapped it up! Thanks for the recipe! Check out my blog for a picture: http://www.TheMintedIdea.blogspot.com
Ho! Ho! Ho!
Heather
Hi Kim
I loved this idea of Hot Chocolate on a stick and made them today as a trial run as I am giving them out for a baby shower. I can’t wait to test taste them tomorrow 🙂
You had mentioned in one of the replies that you might make a tag saying to “put them in hot milk” I was wondering if you had made a tag.
Also wondering where you got the ice cube trays.
Thank You for all the great ideas.
Joanne
I am looking for a recipe that you can use hot water instead of milk when serving hot chocolate on a stick is this one good for that?
Mine came out mushy ? I did everything as directed .
Hi Kim~ These are so cute and look so yummy! Thanks for sharing and the adorable printable too!
Thank you, Emily!
I love these wooden skewers! Just did a post on frozen chocolate banana pops using them!
Just wanted you to know that making these has become a holiday tradition in our house! Thank you for the great recipe!