welcome to
The tomkat studio blog
Search
DIY Family Portraits :: Photography Tips
Share To:
If you love sending holiday cards but for whatever reason aren’t able to book professional portraits this year, this blog post is for you. Since the goal of this post is to show you how to take your own quality family portraits, these instructions are written for use with a dSLR camera, but may be used with other camera types that allow manual settings and interchangeable lenses.
Thanksgiving is a great opportunity to try taking your own family photos, since most families will be dressed nicely and have plenty of spare hands around to help if needed. Just remember to try it out before tummies are too full, shirts are stained and eyes are too tired.
What you’ll need: dSLR camera of choice with lens, your family, and a person or tripod to hold the camera (remote or camera timer function necessary with tripod).
1. Pick your location and time of day
These go hand in hand, but don’t let the location worry you too much, you only need as much room as fits in your viewfinder, so almost anything will do. Early in the morning or the hour before sunset are best for outdoor because of the versatility available while the sun is still low and not too bright. If your only choice is during the day, you may opt for something indoor near a large window or outside near the edge of an open shaded area. Keep in mind, the more area between you and the background the more blurred the background will be, while positioning yourselves flat against a wall or building will put more of the image in focus. Plan ahead what time of day, look and location you want so you are prepared to capture the moment in your ideal lighting situation. If you have young kids, I highly recommend choosing only one location and one pose as it can be difficult to keep them cooperating between setups.
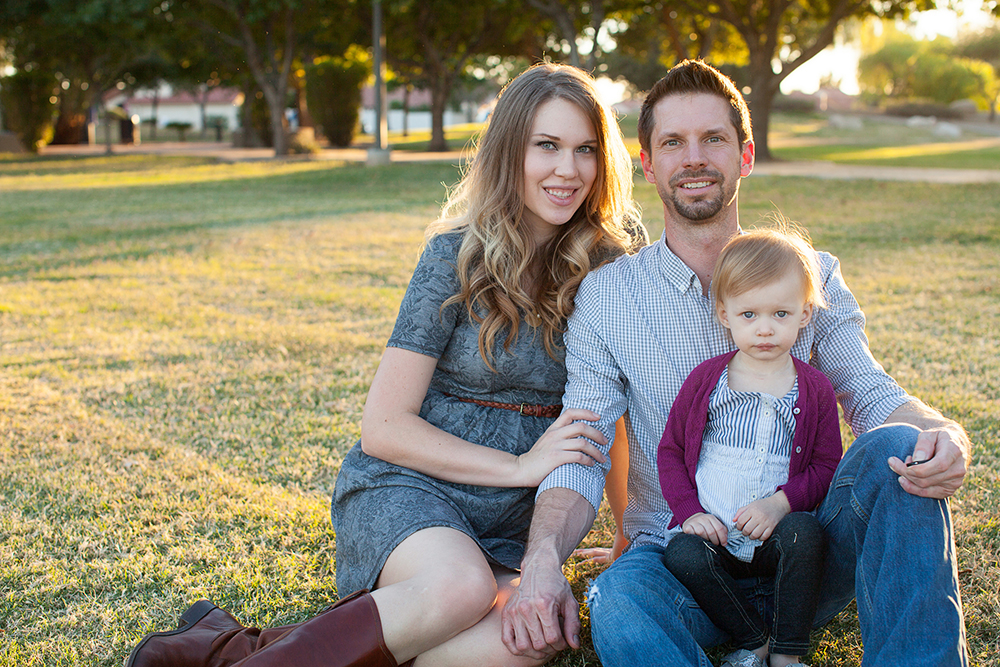
50mm, f4.5, ISO200, 1/200, resized and sharpened only

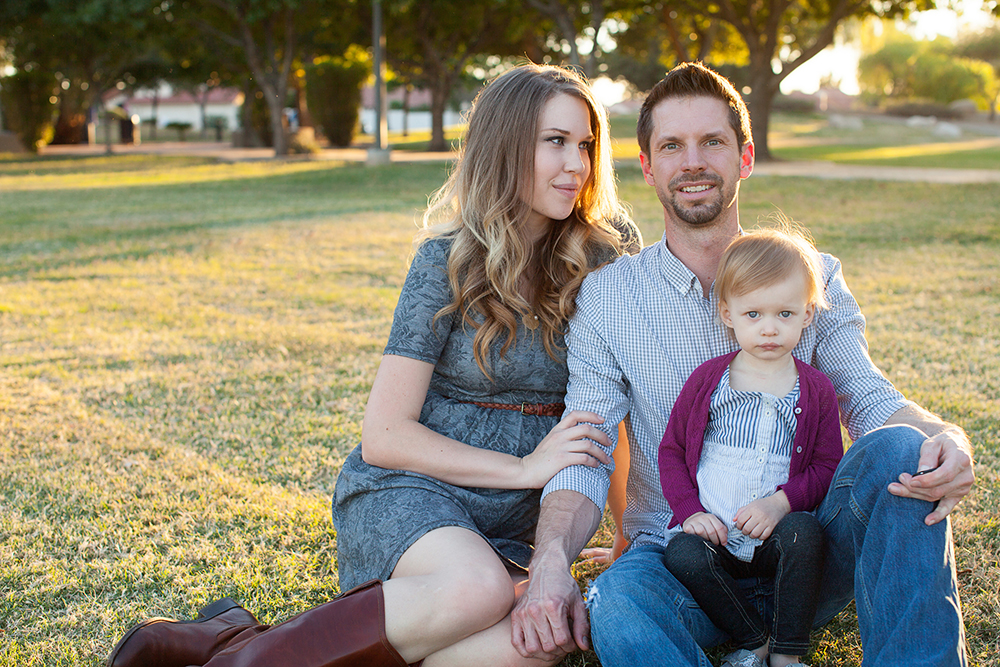
For the sake of this blog post, I chose the park by my house, since I think that’s a realistic option for most people (the park by your house, not mine!). If shooting a backlit image like these, try to avoid getting sun directly into your lens, either by shooting at an angle so the sun is just to the edge of your frame, filtering the sun through trees or other objects, or using a lens hood.
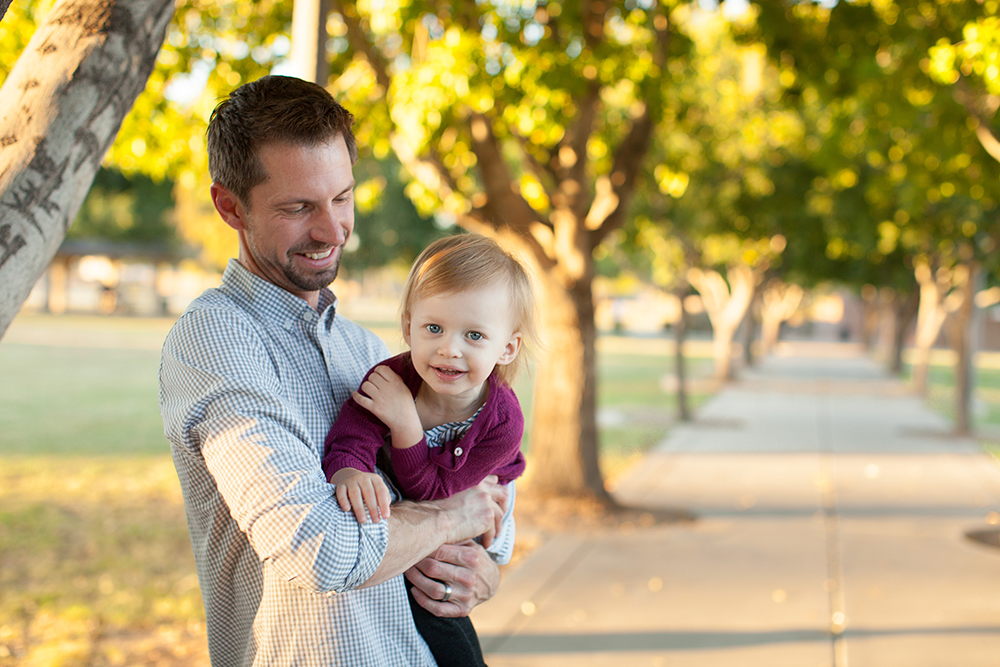
50mm, f2.8, ISO400, 1/250, resized and sharpened only

You can also try using a location where the background progresses further away from the camera and subject, even beginning in the foreground and distancing itself off camera to create even more depth in your image.
2. Tripod or trusted helper
You may find it easiest to set your camera, frame your shot, and have a stand in press the shutter button for you, or you may prefer a tripod with your camera set to remote control or self timer settings. If you’re using a friend or family member, choose someone patient and good at following directions so you make sure you get the shot you’re looking for. If you use a tripod, it may still be a good idea to have another person stand near the camera to get your kids’ attention or make sure no one is making funny faces at the camera. They can even still press the shutter button for you, or hold the remote so you don’t have to.
3. Camera settings
You have a few options for settings, depending on how many people are in your image and what type of lens you are using. If you are looking for something with a good amount of blur and background separation, use either a wider aperture prime lens (like the popular 50mm 1.8) or a zoom lens at a longer focal length. In this situation, I would set my aperture first, then my shutter speed and ISO. In general, you’d want your aperture about equal to the number of people in the photo, give or take depending on the subjects’ distances from the camera. For example, If there are only two of you and both your faces are equally as far from the camera, you can go down into the 1.x aperture range, where if one person were to stand slightly further back than the other, you’d need to stay above 2.0 to get an in focus picture.
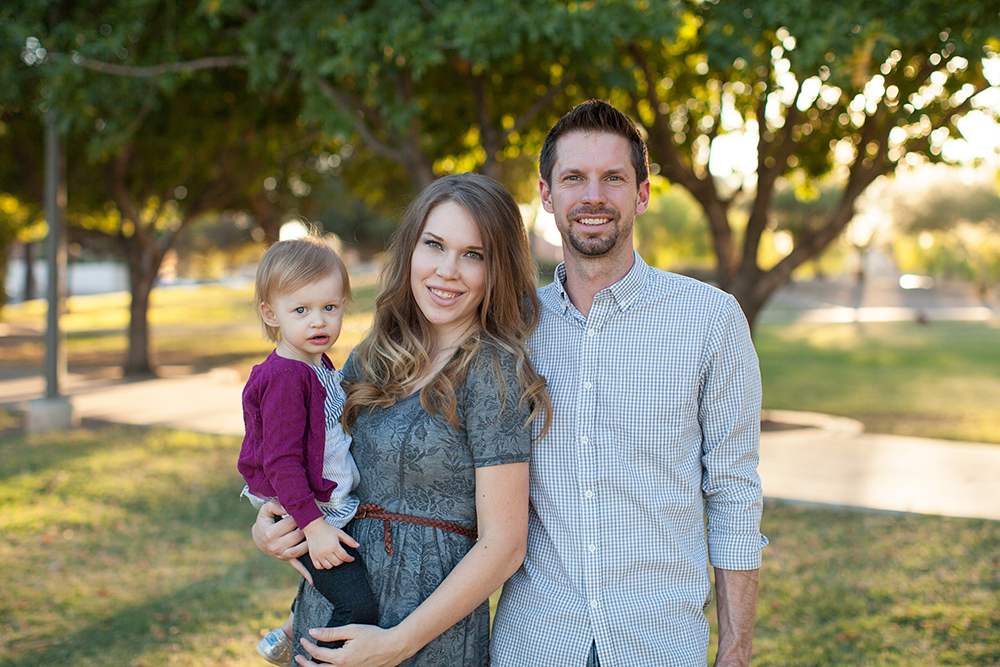
50mm, f2.5, ISO200, I/640, resized and sharpened only

If you choose to use a prime lens, the wider your shot (farther away the camera is from the subject) the wider your depth of field will be also, so you have a better chance of keeping everyone in focus even with a wider aperture. The closer you move in with say a 50mm lens, the more background blur you’ll get and the shallower your depth of field, so you may need a narrower aperture. If you use a zoom lens, you can use a narrower aperture of 4.0 or higher zoomed in to maintain focus on your subjects and a good amount of background blur. Choose what you like and how you want your image framed, and set your aperture based on that. You can easily snap an image of everyone in place and zoom in on faces to make sure everything is sharp before taking a bunch of photos.
review:
longer focal length= more blur
shorter focal length= less blur
wider aperture=more blur
smaller aperture= less blur
closer to subject= more blur
farther from subject=less blur
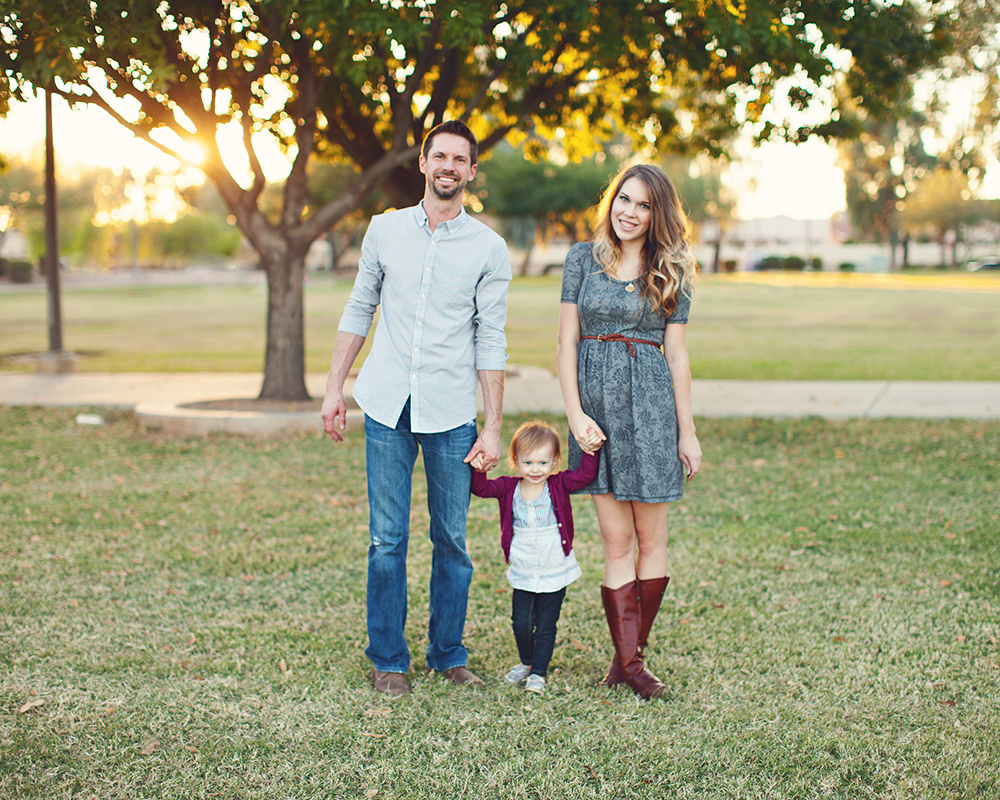
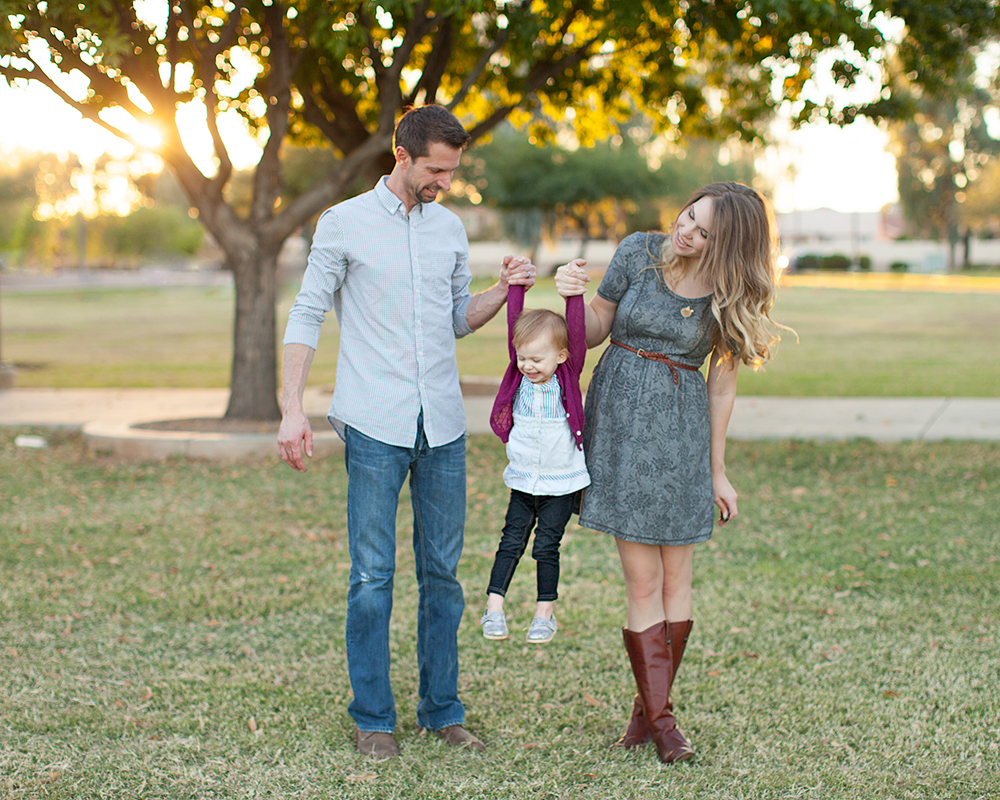 50mm, f2.0, ISO200, 1/320, resized and sharpened only

50mm, f4.5, ISO200, 1/200, resized and sharpened only

Next, I would set my ISO and shutter speed. I like to have a faster shutter speed when kids are involved, so I usually try to keep it above 1/200 if light allows, the higher the better for toddlers like mine. I also try to keep my ISO as low as possible, since higher ISOs allow more noise into your final image. Use your meter and adjust these settings until you’re happy with the exposure.
Set your white balance. Read your camera manual to determine how to do that, or if all else fails, there are some free programs or trials that can help you after the fact, but it’s much easier to get everything right in camera.
Set your focus. You can do this manually, use auto focus then switch to manual so it doesn’t change, or there are ways to use auto focus to select focal points or focus and recompose which can be found in your manual.. Once you decide which is best for you, set your focus on your camera on tripod or instruct your helper on how to properly focus.
4. Take a test shot, check it, then take as many images as you want! Before you leave, check your images again to make sure you have one that will work.
5. If you have set everything correctly, you won’t need to do any editing to your images for a holiday card, but if you’d like to make some adjustments, there are many free programs out there (search for free photo editor), or you can download a free 30 day trial of Adobe Lightroom, which is fairly easy to use, can accommodate several different photo formats (if you shoot in jpeg or raw), has many capabilities and is an affordable permanent purchase if you like it. Then, order your cards!
50mm, f2.0, ISO200, 1/320, edited

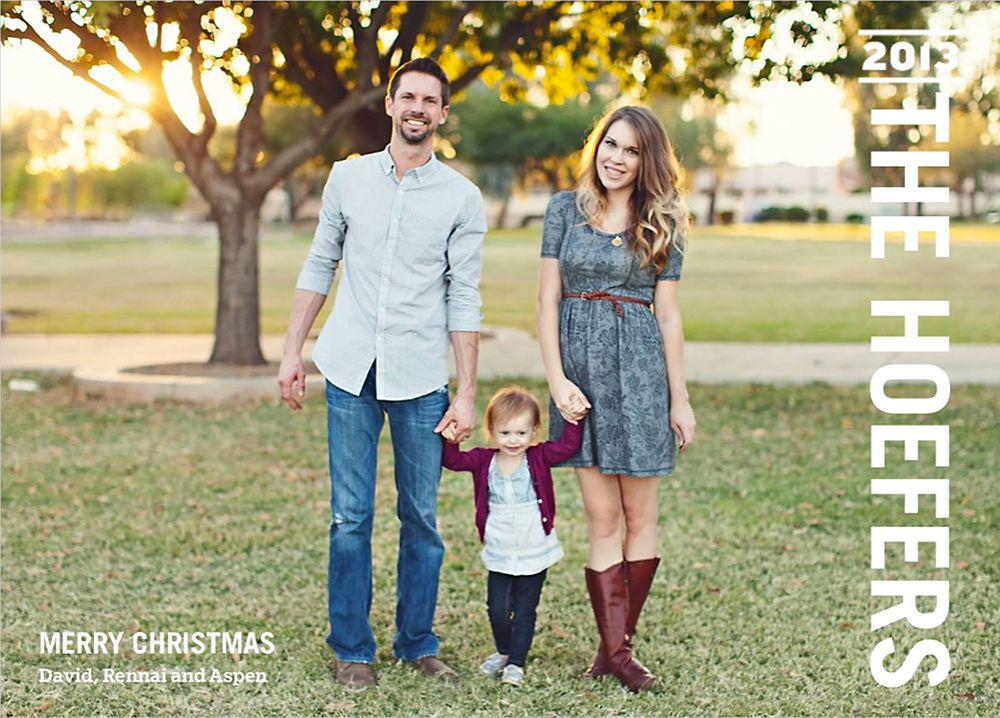
card design from Shutterfly

Happy, Happy Holidays!
If you have any questions, please comment below and I will be happy to answer them for you!
November 29, 2013
Post Date:
Leave a Reply
SUBSCRIBE
Don't miss a thing! Subscribe to our email list to keep up with our latest projects, listings, blog posts and giveaways!


Thank you SO much for the awesome tips! I’m going to give this a go with my family in the next couple of weeks 🙂
Fabulous! Let us know how it goes!
What a helpful post! Thank you so much!
The tips you have given here are really useful for some one looking to get some portrait pics with the family. This is very important to have all the things in place as per demand before you start with your program.Rennia is really written in informative blog.
IF you are also looking to have some portraits of your family, you may need to contact some professional studio photographer. I used to live in Bristol area where we have a quite old and famous photo studio. you can know about them by visiting this page http://www.jeffersonstudios.co.uk/about-us.htm